Showing posts with label Winter. Show all posts

Jan 6, 2014

Disjointed {Satsuma Muffins with Brown Butter Pecan Glaze}

Like many other folks in South Louisiana, I grow satsumas in my backyard.
Satsuma Muffins with Brown Butter Pecan Glaze | Ms. enPlace

Satsumas are super sweet, super juicy, easy to peel, small citrus and are related to mandarin oranges.  Large groves can be found in Plaquemines Parish, south of New Orleans in the Jesuit Bend area.  Jesuits brought satsumas from Japan to Louisiana in the 18th century.  Backyards all over Southern Louisiana as well as other Gulf Coast states are dotted with satsuma trees.

Satsuma Muffins with Brown Butter Pecan Glaze | Ms. enPlace

Winter is satsuma season here.  I always find that disjointed.

When I look out the window and see bright, sunny-looking citrus fruit against dark green foliage, winter isn't what I think of.

Maybe that's the thing, though.
Would you believe it's 31º F in this picture?

satsumas


Cold enough to want to bake.
Satsuma Muffins with Brown Butter Pecan Glaze | Ms. enPlace


Satsuma Muffins with Brown Butter Pecan Glaze | Ms. enPlace

Print It!

Satsuma Muffins with Brown Butter Pecan Glaze
from Ms. enPlace

muffins:
2 cups flour
1 Tbsp baking powder
1/2 tsp salt
1 cup sugar
3/4 cup milk
1/4 cup satsuma juice
1 tsp satsuma zest
1 egg, slightly beaten
1 Tbsp vanilla
4 Tbsp melted butter

glaze:
2 Tbsp butter
about 3/4 to 1 c powdered sugar
3 Tbsp finely chopped pecans

Preheat oven to 350ºF.
Line 12 muffin tins with paper liners and set aside.  Blend the first four ingredients in a medium mixing bowl.  Blend milk, satsuma juice, zest, egg, and vanilla in a small bowl.  Add milk mixture to the dry ingredients, combining just until moistened.  Add melted butter and stir well.
Spoon batter into muffin tins, and bake 15-20 minutes, or until tops begin to brown.

Remove the muffins from the oven and set aside to cool while you make the glaze.

Place 2 Tbsp butter in a skillet over low heat.  Heat slowly, stirring occasionally, until the butter develops a golden brown color.  Add the pecans and cook in the butter for a couple of minutes.  Stir in 1/4 cup powdered sugar until smooth.  Gradually add more sugar a couple of tablespoons at a time until the glaze is as thick as you'd like.

Spoon the glaze over the muffins and serve.

More Satsuma Recipes:
Breakfast Bruschetta w/ Rum Syrup
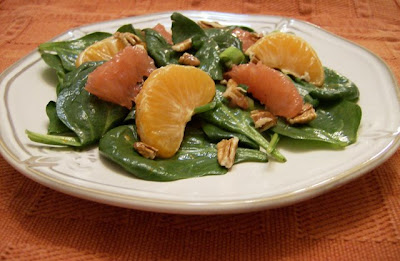
Citrus Spinach Salad
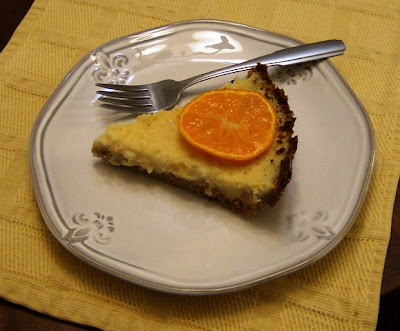
Satsuma Buttermilk Pie


What's in the past... 
still tastes good
Vanilla Muffins
Chicken alla Pizzaiola
Shrimp Creole
Linking with:


Yesterfood
Feeding BigThe 21st Century Housewife Hearth and Soul Blog Hop
Full Time MamaMiz Helen’s Country Cottage
Jam Hands
My Turn for us


Google+

Nov 26, 2008

Tryptophan...Take Me Away

Right about now, those of us who celebrate Thanksgiving are gearing up for some lazing around, drunk and dreamy from tryptophan and carbs. For many years I never understood the obsession people have with leftover Thanksgiving turkey. Side dish leftovers, yes. Don’t get between me and the leftover potato casserole. I do mean it. Turkey leftovers...eh, no. I guess I just never used leftover turkey correctly. Growing up, the tradition was a turkey sandwich Thanksgiving night. What’s to get excited about? Cold turkey on a buttered brown-and-serve roll. Whoo-hoo. Turkey isn’t high on my list of things to eat anyway.

But here’s my dilemma. As uninterested as I am in leftover turkey...especially the dark meat, which no one in my house is wild about, I am also frugal (cheap) and hate wasting food (money). So the leftover turkey must be eaten.

Many years ago I thought I’d make turkey tetrazzini with the leftovers. It was a flop. I’m not sure why. I followed a recipe from a well-respected chef. The dish was dry and bland, definitely not to be made again. It puzzled me though. I like mushrooms, pasta, Parmesan cheese, why was this a failure? Hmmm...does anyone smell a project coming on?

One day-after-Thanksgiving I looked around the kitchen. I had mounds of leftover turkey (mostly dark meat), unused celery, onions, chicken broth, cream (since changed to half and half...gotta keep my girlish figure), herbs, and mushrooms from Thanksgiving dinner. I had Parmesan cheese. I always have Parmesan cheese. I had 3 types of pasta—spaghetti, penne, macaroni. Surely I could come up with something similar to tetrazzini, but with a creaminess and flavor I and my family would like. Yes, you know where this is going. Of course I came up with something. Otherwise this would be an uneventful post, wouldn’t it?

Knowing a few cooking methods, like how to make a cream sauce (one of my favorite things on Earth), the basics of tetrazzini, and asking my son for input, I came up with a casserole—made from leftovers—that my family actually looks forward to every year. My husband once said that he didn’t mind eating the leftover dark meat if it was in “The Casserole.” In case you’re wondering how my son fits in to this story...I asked him to choose the pasta. He is a little pasta-loving freak. Secretly, I hoped he wouldn’t pick spaghetti. In keeping with his four-year-oldness (his age at that time), he chose macaroni.

So in addition to the traditional Thanksgiving foods we eat every year, Turkey Tetrazzini-Style Casserole has also become a tradition. I share lots of recipes with lots of people on a daily basis. But, the ones I’m most proud of are the ones I’ve come up with myself. This is one of ‘em.

* This casserole freezes well.
* I like to reheat it on the stove top
* Sherry has a distinct flavor. Some people don’t like it. If you think you may be one of those people, skip it, or use white wine.


Turkey Tetrazzini Style Casserole
from Ms. enPlace

2 1/2 cups uncooked elbow macaroni
3 tbsp butter
1 cup thinly sliced onion
1 rib celery, thinly sliced
8 oz mushrooms, sliced
3 cloves garlic, chopped
3 tbsp flour
1 1/2 cups chicken broth
1 cup half and half
1/4 cup dry sherry
salt, black pepper, red pepper flakes, fresh thyme, ground sage--amounts depending on personal taste
3 cups cooked turkey
1/2 cup grated Parmesan cheese, plus more for topping
1 cup cheddar cheese, plus more for topping

Preheat oven to 375. Cook macaroni according to package directions and drain.

While macaroni cooks, chop vegetables. Sauté in butter. Start the onions and celery first. When onions get soft, add garlic and mushrooms. After all the vegetables are done to your liking (I like to get the onions caramelized a bit), add flour to thicken mixture.

Stir in broth, half and half, and sherry. Allow to come to a boil, then simmer to thicken the sauce. Add turkey and cheeses to the sauce. Allow cheeses to melt. Add cooked macaroni to pot and blend everything well.

Pour mixture into a greased 13 x 9 pan. Top with additional cheese. Bake at 375 for about 20 minutes.


Got everything in order, right? Cook the macaroni, drain, and set aside. Don't overcook the mac or it will be mushy after baking the casserole. Mushy mac = icky meal.

Chop and saute the vegetables. Start with the onion and celery. They take longer to cook. Add in the garlic and mushrooms.

Sprinkle in the flour. It will help thicken your sauce.

Add the liquids, bring to a boil, then simmer to thicken.
Add the turkey and cheeses. Stir to combine. Gently stir in the macaroni.
Add to a greased 13 x 9 casserole and top with additional cheese.
Bake for around 20 min. at 375.

Serve.
linked with:

Nov 5, 2008

See Ya In the Gumbo!

Instead of good-bye, that’s what my great-grandpa chose to say when a visit was over. Considering what gumbo is, I guess he meant something like see you in the mix. It’s hard to explain, but we knew what he meant. He was a hoot.

Assigning a definition to gumbo is a challenge. At its core, gumbo is a cross between a soup and a stew. Please, I beg you, do NOT call it “stoup”...I can’t stand Rachael Ray and if you apply her inane chatter to one of the most loved dishes of my people I will have to seriously hurt you. I don’t care if her daddy is from Louisiana. I mean, for Pete’s sake, this woman thinks a decent gumbo can be made in 30 minutes. Damn-O, how offensive is that??? (That was my best RR impersonation, by the way.)

Gumbo can be made with just about anything. Chicken and sausage gumbo, seafood gumbo, squirrel gumbo, rabbit gumbo, guinea gumbo, dove gumbo, robin gumbo (illegal, by the way), green gumbo or gumbo z’herbes...ok, starting to sound like Forrest Gump. My dad has his famous duck and oyster gumbo, a combination that I’ve never seen before. Regional variations can include adding a heaping spoon of potato salad to your bowl of gumbo. This is most often seen outside of New Orleans. A friend from Kaplan, LA once mentioned to me that her mom liked to add hard boiled eggs to their chicken and sausage gumbo. In my experience, the family gumbos I’ve eaten in and around New Orleans always contain okra and usually some form of tomato (diced, paste, sauce). The family gumbos I’ve eaten with my in-laws, in the middle of Cajun country, never have okra or tomato. Not one speck. That doesn’t mean this holds true for every family.

So, how to define gumbo? Well, a roux is almost always involved. Notice I said almost. And, frenzied debates have popped up amongst the best of friends over what to use in a roux (oil, butter, margarine, etc.), what is the “right” proportion of fat and flour, and how dark a roux should be. The holy trinity is used (onion, celery, bell pepper). But even that combo is at the mercy of individual cooks.

The word gumbo comes from the West African word for okra. Okra was brought from Africa to Louisiana by slaves. The okra plant is a relative of hibiscus and Rose-of-Sharon; the similarities can readily be seen in the flower structure. Many people use okra, which helps to thicken the gumbo. But, others (presumably like me, who don’t care for it) use filé powder (ground sassafras) or simply just the roux to thicken their gumbos.

It seems that every gumbo component can become tangential. Wait. Rice. The dish is served over rice. Although, I’m guessing there are exceptions to that as well. I have to stop and ask...how can a dish, whose roots are from such humble, simple ingredients be so intricate? Because the definition of “gumbo” is the cook herself/himself.

There are infinite variations of gumbo...as many as there are cooks. Everyone has their own way of making gumbo, usually the way their mom made it, which is the way her mom made it, and so on. I guess gumbo really is in the genes...the recipe passed on by family, but with a few differences to make it unique.
~~~~~~~~~~~~~~~~~~~~~~~~~~~~~~~~~~~~~~~~~~~

Right about now, we call this “gumbo weather.” This is the time of year where I feel most connected to my culture. With the first cold snap, I head to the store. As I’m loading my shopping cart with chicken, andouille sausage, onions, celery, and so on, the person next to me is doing the same...as is the person next to her. In the checkout line, it is obvious that everyone is shopping for the first gumbo of the season. On a crisp fall evening, in kitchens across the region, the results will differ from pot to pot, but the overall result will transcendentally link us when we all sit down to eat, as if triggering our genes.
~~~~~~~~~~~~~~~~~~~~~~~~~~~~~~~~~~~~~~~~~~~

My husband is the gumbo cook in my family. He has experimented with the recipe below for several years. One day, a bit of laziness took over and he pulled out the food processor to replace chopping onions, celery, bell pepper, and garlic. Well, laziness paid off, not only benefiting his arm, but the flavor of the gumbo. He ended up over-processing the vegetables, liquefying them. That gumbo had the best flavor out of any. He learned by mistake that this was the way to go!

Another trick he learned from experimenting is to use stock, not water, as the liquid. Yes, it takes more time to make stock. Yes, making gumbo is already a long process. Yes, I realize your time is precious. Suck it up, listen, and trust me, using stock will make a definite difference. Besides, you’ll be saving some time letting a machine mince the vegetables into oblivion.


Chicken and Sausage Gumbo
from Ms. enPlace

3/4-1 cup vegetable oil
3/4+ cup flour
5 large onions
6 stalks celery
1 bell pepper
10 cloves garlic, 4 unpeeled, whole and smashed, 6 peeled
1 chicken, cut up
1 lb andouille sausage
chicken stock (see below)
salt, black pepper, cayenne/red pepper
cooked white rice
2/3 cup green onions (optional)

Step 1: Prepare/Chop Ingredients and Make Stock. Rough chop 3 onions, 6 cloves garlic, 3 stalks celery, and 1 bell pepper so they fit into the bowl of a food processor. Process the vegetables until mushy. Food processing results in a richer, more flavorful gumbo, but you can hand-cut your vegetables if you do not own a food processor.

Meanwhile, fill a large pot with 2 onions (cut in half), 4 cloves of unpeeled garlic, 3 stalks of celery, a generous amount of black pepper and cayenne pepper. Yes, I season my stock...whatcha gonna do about it? Bring the pot to a boil, add your chicken and simmer until your chicken is done. Take your chicken out, let cool, then remove the meat from the bones. Do not discard the water that you boiled the chicken in. After carving the chicken, return the bones to the pot and continue to simmer until you end up with a nice chicken stock. Strain the stock and reserve it for adding to the gumbo later.

In a saute or frying pan, cook the andouille sausage until browned. Keep chicken, sausage, and pan drippings from sausage on the side until needed.

Step 2: Make a Roux. Begin by putting ¾-1 cup vegetable oil in a cast iron, or stainless steel pot. Do not use non-stick cookware. Heat the oil on medium-high heat. Wait until oil is very hot. Then, gradually add flour a little bit at a time, stirring/scraping constantly with a flat-edge spatula. Keep adding flour as roux browns; you will know you’ve added enough when all of the vegetable oil has combined with the flour and when the roux no longer looks oily.

Stir constantly. This step takes time, usually about half an hour. Roux is done when it is a dark caramel color and has gotten considerably thicker than when you began.

Step 3: Assemble the Gumbo. When the roux is done, immediately add the vegetables (except the green onions). This will stop the roux from cooking further and will result in a clumpy jumble of vegetables and solidified roux. Cook this over medium heat for about 5 minutes so that the onions, etc. soften. Add the chicken and sausage. Let this cook for a while (about 10 minutes) in the mixture of roux and vegetables. Then, slowly add chicken stock. Let gumbo cook over medium heat for as long as possible (minimum 1 hour). About half an hour before serving, add green onions and season to taste with salt, black pepper, and cayenne pepper. This is also when you want to begin cooking your rice.

Sometimes, if you’ve used a lot of dark meat or fatty meat, a layer of oil will rise to the top of the gumbo. You can simply skim this off with a spoon. (No one said this stuff was healthy).

Step 4: Serving. Serve gumbo over rice. Top with green onions. Leftover gumbo can be refrigerated or frozen for later use. (Note: do not refrigerate or freeze gumbo with rice in it. The rice will absorb the liquid. Store leftover rice separately or make fresh rice for each meal).

First, prep your vegetables and start making your stock. Stock takes a long time. Do this the day before if you want.


Here's the stock. Use all the peelings and tops from your vegetables to add flavor. I like to freeze all that stuff and use it whenever I make stocks. Here's a step-by-step. Homemade stock is awesome and adds rich, deep flavor to sauces, soups, etc. Make a huge pot and freeze what you don't need here.


I like to brown the sausage before adding it to the roux. I don't know why. That's just how my family does it. So I do it that way too. Oh, and don't waste the pan drippings from the sausage. Save that for the gumbo too.


Next, start your roux. Here's the thing...once you start making a roux, you cannot stop. Don't walk away from the pot or the roux will burn. Stories are told all over Louisiana about how kids could be bleeding, but if mama was making a roux they'd better tend to the problem themselves. Don't answer the phone, don't get the door, don't take even the quickest of potty breaks.

This is the beginning and the end of the process. The entire deal can be seen here:
How to Make a Roux.


Once your roux is the color you'd like, add the vegetables. There's no better smell than the trinity hitting hot roux. After the vegetable mixture cooks a bit in the roux, I like to also add the chicken and saute it for several minutes. More chicken was used than what appears in the photo, by the way. (The chicken was cooked in the stock, removed, cooled, and picked from the bones. Toss bones back into stock.)


Recap: So now the roux is made and the vegetables have been cooked in it. The chicken has been sauteed in the roux/veg mixture. The sausage and drippings have also been added to the pot. Next, add warm liquid...your stock if you've made it (and I hope you have). I don't advise using cold liquid such as stock right from the fridge or water from the tap. I've had too many gumbos separate from using cold liquid.


Simmer for at least an hour, the longer the better. Add more stock/liquid if needed. Just before serving, skim excess grease from the top and add green onion tops. Serve over rice. Pass filé powder at the table.

See ya in the gumbo!

Oct 8, 2008

Good Gravy! That’s Rice & Gravy.

Every good Cajun loves a good rice and gravy. Cajun men, in particular, seem to possess a strong envie (craving) for this dish...especially if it is made by their Maw-Maws or Mamas.

If you aren’t familiar, rice and gravy also involves meat. No, I don’t know why this isn’t mentioned in the recipe title. Inexpensive cuts of beef are usually used. Chicken and pork can also be used. My preference is for round steak. I’ve also used stew meat. My mother in law prefers seven steaks (or seven bone steak). Onions are always present. Bell peppers usually surface. Depending on the cook, garlic and/or celery may be added.


Before we get started there are some things you should know.

* This is not a fast meal. All this goodness takes time, patience, and love (which is partly why it is so good).

* If you try to adapt this to a crock pot I will be very sad. No...I’ll be hot (and not the good kind). I will be angry and fly into a rage. For the love of Pete, don’t do it. It just isn’t the same. Please trust me on this.

* As you brown the beef, it will become extremely tough. You will face a moment of doubt. You will curse me and start wondering if everything you read on the internet really isn’t true after all. Look, I wouldn’t steer you wrong, babe (at least not intentionally). Part of the magic of a good rice and gravy is the slow simmering. This will make the meat nice and tender...falling apart.

* Do not use a non-stick pot. I repeat...NO non-stick cookware. Again, please just trust me. You’ll want the meat to stick. This is what helps the gravy get dark and lovely.

* The more onions you use, the thicker the gravy will be.

* The more you brown the meat, the darker your gravy will be.


So...ready to move on to the recipe? Ok. Gather up what you need. I’ll wait.

Printer Friendly
Rice and Gravy 
from Ms. enPlace

Oil or Crisco
1 pound round steak
Salt, pepper, Cajun or Creole seasoning
1 very large onion 
Water
1 bell pepper
2 ribs celery, if you want
3-4 cloves garlic, or as much or as little as you want
cooked rice

If you have a cast iron pot, by all means use it. Do not use a non-stick pot. You’ll be sorry. Chop all vegetables. Cut steak into pieces and season with salt, pepper, and Cajun seasoning. While you are doing this, heat vegetable oil or Crisco (about med-high heat) in the bottom of your non-stick pot (enough to thinly coat the bottom).

When oil is hot, add meat. Brown the meat, allowing crust (fond) to form in spots on the bottom of the pot (this is key for a rich, dark gravy). At first, all you will see is your steak boiling in juices. That’s fine. You’ll have to cook off the juices before you get a nice crust on your pan. It will take some time. Really, you are doing fine. Stir while browning the meat. You want brown, but not burnt. Once you've got some crust forming, add a little water (enough to cover the bottom of the pot), scrape the crust with the flat edge of a spatula, and cook down again, evaporating the water. Brown to get crusty spots to form on your pot again, add water, scrape the pot, cook the water away again. Same deal as before. Repeat this process a few times. It will help make your gravy darker in the end. I like to repeat this process about 4 times. No, I’m not crazy. I just like a good, dark gravy. You should too.

Once the meat is really brown and you are satisfied with the color of the water (more water will be added to your final product, so it should be really dark), evaporate the water away one more time, add chopped onion, bell pepper, and celery if you are using it and cook until they brown up a bit. Toss in some chopped garlic and cook a few minutes.

Add enough water to cover the meat and simmer until the meat is tender. This takes a while for certain cuts of meat (sometimes I use stew beef). When I say “a while,” I mean at least an hour. The longer the better.

When you are satisfied with the tenderness of the meat, reduce the water to make a thicker gravy. Taste for seasoning and serve over rice. Mais, talk about good!


Using round steak today. I've got my oil nice and hot and added the meat...and I'm not using non-stick cookware. Cast iron or stainless steel works really well for this.


Notice all the liquid in the bottom of the pot.
Totally normal.This will have to cook off before you can get nice crusty spots to form.
  
The meat has started to brown up nicely,
but we still have a ways to go til good gravy.

Now the meat is starting to stick a little, leaving behind lots of beautiful, yummy crusty goodness. This is what will make your gravy nice and dark and provide a deep flavor. Oh, my! No, it's not burnt!  It's pretty!

I've added some water and started scraping the crust of the bottom. Crust is such an ugly word. The French call it "fond." A Cajun might call it "gremille," which means little bits, scraps, or crumbs left in the bottom of the pan.  It's all good. I'll let this water cook off and allow more crusty goodness to form. Add more water. Scrape. Cook water off. Do this about four (4) times. 
Yes, really.
 
Skipping ahead here, so pay attention! I've gone through the crust-forming steps four times. Then, I've added my chopped onion, bell pepper, etc. and allowed that to brown a little too. Add water to cover everything and simmer for at least an hour, or until meat is tender.


So, here it is. All I have to do is cook the rice, let this simmer, and wait for dinner. Ya'll come on over!

Linking this to The Saturday Evening Pot's
Star Recipe Collection